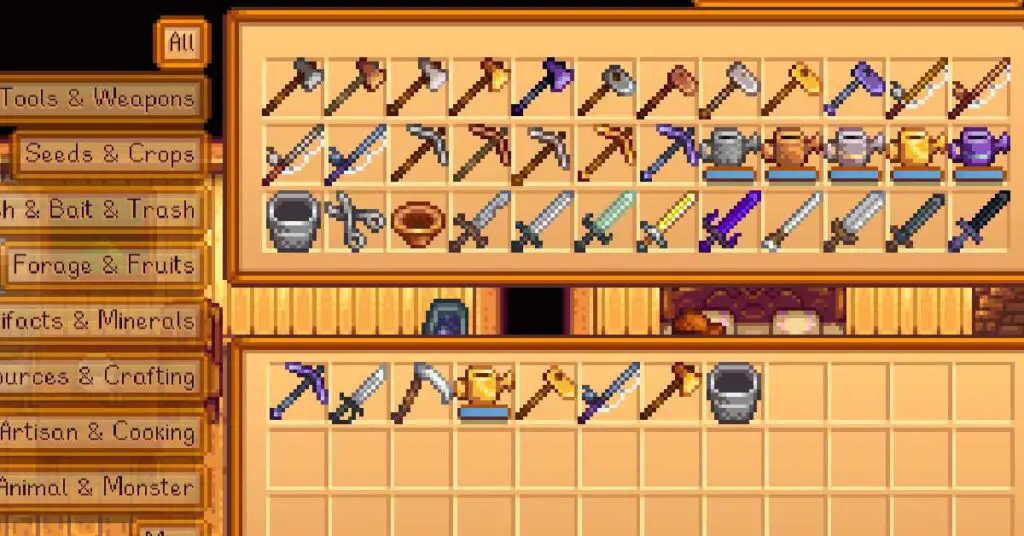
You’ve got your overalls on, the sun is shining, and the birds are singing. It’s time to start your new life in the enchanting world of Stardew Valley! But you can’t be the greatest farmer in the valley without the right tools. We’re here to help you make the most of your farming adventure with our guide on How to Upgrade Tools Stardew Valley. Let’s dive in and explore what tools are, when to upgrade them, and the perks of doing so!
What Are Tools in Stardew Valley?
In Stardew Valley, tools are your bread and butter (or your pickaxe and hoe, to be more precise). They are essential for the day-to-day tasks of farming, mining, fishing, and foraging. There are six main tools you’ll start with:
- Axe – Chop down trees and break logs.
- Pickaxe – Break rocks and mine minerals.
- Hoe – Till soil for planting seeds.
- Watering Can – Water your plants.
- Scythe – Harvest crops and cut grass.
- Fishing Rod – Catch fish and other aquatic creatures.
As you progress through the game, you’ll have the opportunity to upgrade your tools to become more efficient and effective. Who doesn’t want to be the most envied farmer in Pelican Town?
When to Upgrade Tools?
Now that you know the importance of tools, you’re probably wondering when you should upgrade them. There’s no one-size-fits-all answer, as it ultimately depends on your playstyle and priorities. However, there are some general guidelines to follow:
Early Game
Focus on upgrading your Axe, Pickaxe, and Watering Can. The Axe and Pickaxe will help you clear your farm and access valuable resources, while the Watering Can makes daily watering a breeze.
Mid Game
Upgrade your Hoe and Fishing Rod. A better Hoe will make tilling soil faster and more efficient, while an upgraded Fishing Rod will increase your chances of catching rare fish.
Late Game
Upgrade all your tools to their maximum level for ultimate efficiency. At this point, you’re a true farming legend!
Perks of Upgrading Tools
Upgrading your tools in Stardew Valley isn’t just about showing off your fancy new gadgets to the villagers; it’s about making your life in the valley easier and more enjoyable. Here are some of the perks you can expect when you upgrade your tools:
Increased Efficiency
Higher-tier tools perform their tasks more efficiently. For example, an upgraded Axe can chop down trees with fewer swings, saving you time and energy.
Unlock New Areas
Upgraded tools can break stronger materials. With an upgraded Pickaxe, you’ll be able to mine deeper levels of the mines and unlock new resources.
Enhanced Abilities
Some tools gain special abilities when upgraded. For instance, an upgraded Watering Can can water multiple tiles at once. Talk about a game-changer!
More Profits
Efficient tools mean more crops, more resources, and more fish, which all translate into more gold in your pocket. Upgraded tools are an investment that pays off in the long run.

How to Upgrade Tools Stardew Valley
Alright, you’ve got the basics down. Now it’s time to learn how to upgrade tools in Stardew Valley. Follow these simple steps, and you’ll be a tool-upgrading master in no time!
Step 1: Gather Resources
To upgrade your tools, you’ll need metal bars. These are obtained by smelting ores found in the mines or by purchasing them from the Blacksmith. The type of metal bar required depends on the upgrade level:
- Copper: 5 Copper Bars
- Steel: 5 Iron Bars
- Gold: 5 Gold Bars
- Iridium: 5 Iridium Bars
Step 2: Save Up Some Gold
In addition to the metal bars, you’ll need gold to pay for the upgrades. Each upgrade level has a different cost:
- Copper: 2,000g
- Steel: 5,000g
- Gold: 10,000g
- Iridium: 25,000g
Step 3: Visit the Blacksmith
Once you’ve gathered the necessary resources and gold, head to the Blacksmith in Pelican Town. The Blacksmith, Clint, is the one responsible for upgrading your tools. His shop is open from 9 AM to 4 PM, Monday through Friday.
Step 4: Choose the Tool to Upgrade
Speak to Clint and select the “Upgrade Tools” option. From there, choose the tool you want to upgrade. Make sure you have the required metal bars and gold in your inventory.
Step 5: Be Patient
Upgrading your tools takes time. Clint will need two days to complete the upgrade, so plan accordingly. Remember, you won’t be able to use the tool while it’s being upgraded, so choose your timing wisely!
Step 6: Pick Up Your Upgraded Tool
Once the two days have passed, return to the Blacksmith to pick up your shiny new upgraded tool. Enjoy the benefits of your upgraded tool and watch as your farming empire flourishes!
In Conclusion
Upgrading tools in Stardew Valley is essential for becoming a successful farmer and making the most of your time in the valley. By following this guide on How to Upgrade Tools Stardew Valley, you’ll be well on your way to reaping the rewards of your hard work and becoming the envy of Pelican Town.
From early game priorities to late game achievements, upgraded tools will make your life in Stardew Valley more efficient, enjoyable, and profitable. So roll up your sleeves, gather your resources, and pay a visit to Clint the Blacksmith to begin your journey to farming stardom.


